Play Plan: Friendly Faces Flash Cards

One of the things that makes family members and friends feel special is when a little one recognizes them. This can be difficult if you live far from loved ones and don’t get to see them often. Additionally, babies and toddlers with stranger anxiety might react poorly to a person they do not see often, even if it is someone you love.

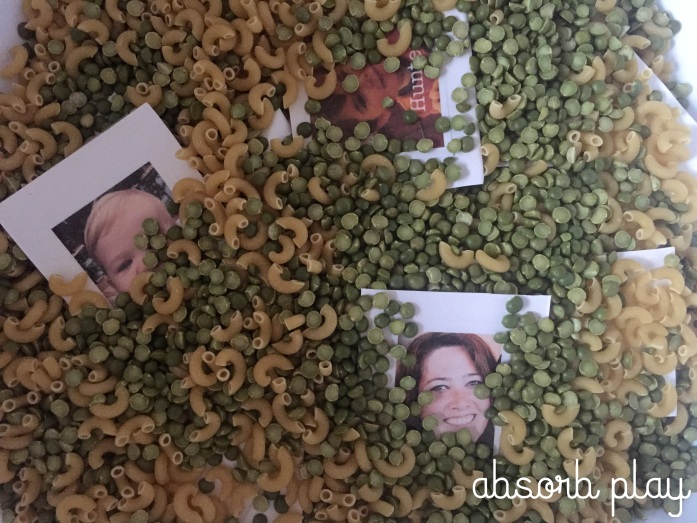
In order to help our little guys learn names and become familiar with family and friends, I created friendly faces flash cards using photos of family members smiling (often pulled from Facebook).  I added the person’s name to each picture and then simply printed them on cardstock. In addition to family that is several hundred miles away, I included immediate family members that live in our house so that my youngest son could work on saying names like “Dada” and “Mama” as well as learn to say his brother’s name.

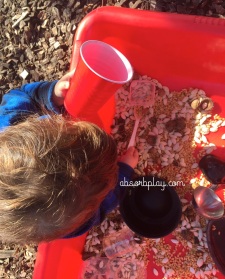
I opted to use these cards in a sensory bin to make discovering the people more fun for the boys. For my two year old I put dry peas and elbow noodles into a bin and then hid the flashcards throughout the bin for him to dig out. For my one year old who likes to put things in his mouth, I opted for filling a bin with ball pit balls and mixing the flash cards in. They each searched through their bins and would pull a card. When they pulled out the friendly face card I would say then name excitedly and say something we enjoy about the person. For example, “Dad. Dad loves to read you stories.” We would put the cards aside until they had all been found then they put them back into the bins and wanted to start again.

The best part was of this activity we were able to use the flashcards apart from the sensory bins. Before we visit with family and friends I like to bring the cards out at breakfast revisit the friendly faces in simple flashcard form. These are also great to use in travel in the car or on planes when you are going to visit loved ones.

friendlyfaces

Objectives:

  • cognitive development: facial and name recognition
  • physical skills: fine motor skills
  • engaged senses: touch, sight, and sound

Materials:

  • cardstock
  • photos
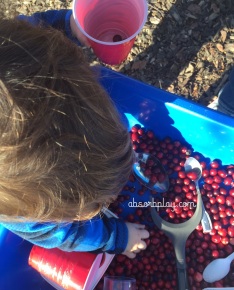
  • bin filler (dry beans, uncooked pasta, rice cereal, cranberries, balls, etc)

Differentiation ideas:

  • use the cards to play a flash card game in the car or plane
  • create two of each card and play a matching memory game

Level of mess:

  • clean


Play Plan: Making Mini Pumpkin Pies

Fall is the perfect time of year for all things pumpkin, and pumpkin pie is one of my husband’s favorite. I am one of the oddities that do not swoon for pumpkin. (Truthfully, I can’t think of anything pumpkin I like!) My children take after my husband with their pumpkin love, so when I considered the idea of allowing them to play in pumpkin I knew they would enjoy it.

IMG_0101
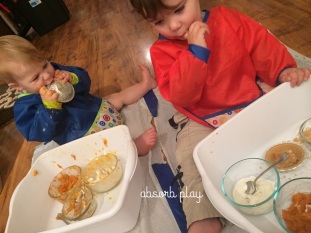
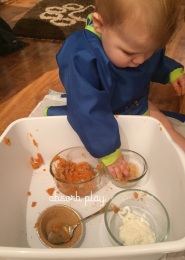
We have been working with both boys on transferring objects from one container to another. Our two year old, Roo, is far more controlled in this process than our almost one year old, Moose, but practice is key.

This activity took very little time to set up as I simply put canned pumpkin puree, crushed graham cracker, whipped cream and a mini pie shell into small bowls inside of a bin. I also placed a spoon in each bin that could be used to move materials from one container to another. For Roo, he used the spoon rather than getting his hands dirty. For Moose, he practiced using the spoon to taste the whipped cream (yay for unplanned benefits!) but then opted for his hands to move materials between containers and to his mouth.IMG_0097

The boys had the opportunity to taste and explore the items in the bowls. I used pumpkin straight out of the can and their love for pumpkin did not extend to the unsweetened variety. They played in the graham cracker crumbs like sand and sprinkled it into the other bowls. The whipped cream was by far a favorite. Moose even opted for licking his bowl!

As a mom, I dread things that I know are going to be a huge mess and this activity is definitely one that can get messy quickly, but part of the fun is found in the making of the mess. Roo stayed fairly clean and only needed to have his sticky hands washed. Definitely important to wear smocks to protect shirts and try to stay clean. Moose on the other hand, immediately needed a bath and we were so thankful we had him participate without pants on!IMG_0110

The finished product would definitely not win a prize at the fair for either taste of appearance, but this mess definitely accomplished our objectives. Sometimes I have to remind myself that a mess is just another opportunity for learning!
IMG_0111

Objectives:

  • cognitive development: exploring different materials; transferring materials from one container to another
  • physical skills: fine motor skills; hand-eye coordination
  • engaged senses – touch, taste, and sight

Materials:IMG_0094

  • bin
  • bowls
  • graham cracker crumbled
  • whipped cream
  • canned pumpkin puree
  • mini pie shell
  • spoon
  • smock (affiliate link)
  • floor covering (optional but strongly suggested!) 

Differentiation ideas:

  • use pudding instead of pumpkin for a pudding pie creation any time of the year
  • use spice container to sprinkle graham cracker to simulate cooking for toddlers

Level of mess:

  • messy

Play Plan: Thanksgiving Themed Sensory Play Bins

thanksgivingbin

Thanksgiving themed sensory bins make for great independent play!


We recently visited a local nature center who was having a Thanksgiving Themed sensory activity for little ones. It was so engaging that I have recreated it here at home, because it was so simple to do and my toddler didn’t want to stop playing in the cranberries!

Sensory bins are wonderful for little hands to explore items and play independently while working on fine motor skills and hand-eye coordination. Moving the filler into cups and bowls with spoons and utensils of varying sizes improves skills through fun exploration.

Choose your bin that you will play in. Make sure your bin is deep enough that the items will stay contained while playing. When playing inside, we have the most success by placing a dollar store washtub on top of a storage bin so that my son can stand and play. If the weather is warm enough, we love to play outside with the sensory bins so that I am not as concerned if items spill out resulting in more creative play for the boys.

thanksgivingbin2

If your baby is too young for pumpkin seeds and corn kernels, try using frozen peas for their sensory bin filler!

In one bin, empty a large bag of cranberries. In the other bin, place hard corn kernels and pumpkin seeds. Add spoons of varying sizes, interesting cooking utensils, cups and bowls. It is interesting to watch what your child immediately grabs and how they begin to play. The bin that has more than one filler material (pumpkin seeds and corn kernels for example) provides a great opportunity to explore similarities and differences, sorting and grouping.

*If you have a baby who likes to put everything in their mouth, try fill your bins with frozen peas and canned corn kernels, or other Thanksgiving foods. Just remember to play alongside your younger explorer.*

Let me know what you plan to fill your sensory bin with!

Objectives:

  • cognitive development: explore how things are similar or different
  • physical skills: fine motor skills; hand-eye coordination
  • engaged senses – touch, hearing, and sight

Materials:

  • bins
  • cranberries
  • spoons
  • cups & bowls
  • cooking utensils
  • pumpkin seeds & corn kernels

Differentiation ideas:

  • use other Thanksgiving themed foods in your sensory bin for those that like to “taste” everything – canned corn, frozen peas, etc.
  • count the number of berries or seeds that filled the cup

Level of mess:

  • minimal mess (clean minus any filler that spills)

Play Plan: Feed My Piggy Bank

Growing up I remember watching Full House and Michelle Tanner would carry her piggy around asking her family, “Will you feed my piggy?” I took to this and loved having change to feed my piggy bank. My mother is great about bringing loose change to feed the boys’ coin banks when she visits and I recently came across a bag of coins that had not made it into their banks when I was cleaning out a basket. Rather than putting the coins in the bank myself, I decided to create a learning opportunity for my Roo.piggybank2

I placed our two coin banks and an unsorted handful of coins on the floor as we sat together. He’s two and no longer likes to taste everything we are working with, but it was still important to monitor this play closely since smaller coins are easy to swallow.

We looked through the assortment and made sure all were visible. I pulled out one of each type of coin we had in the mix: quarter, nickel, dime and penny. I asked him which was the biggest, waited for him to respond and then asked which was the smallest. We had the nickel and penny next to each other to compare the sizes. I asked “which is smaller?” and he compared the two very closely, finally selecting the penny. I placed it next to the dime in our line up and then added the nickel between quarter and penny. We reviewed our sizing by going over the coins saying small, bigger, bigger and biggest and then doing the reverse (big, smaller, smaller, smallest).

Next I moved the coins into four separate areas. I picked up a quarter out of the small pile we had on the floor and asked Roo which coin it looked like as I pointed to the original four. He took it from me and placed it with the quarter. We continued to do this for the remaining 10 coins. Once we finished grouping by type, we began depositing the coins.

piggybank3
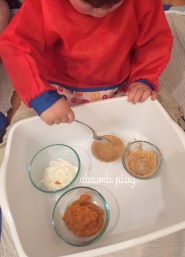
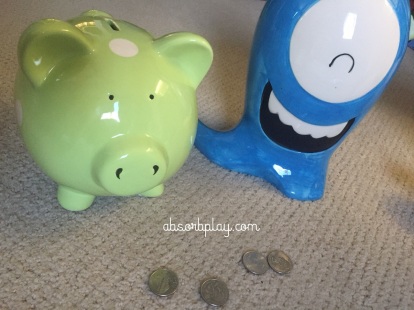
Putting coins in a small opening on a bank is a fantastic way to work on fine motor skills and hand-eye coordination. This task was actually quite challenging for my son at first. I modeled how to put a coin into the bank and then allowed him to try it on his own without correction until he had success. After several attempts discovered that he had to align the coin perfectly before applying pressure. (I love watching him figure things out!) Once he developed this understanding the task became far simpler with fewer misses. The larger quarters were much easier for him to work with than smaller dimes.
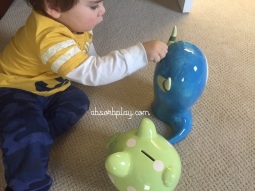
piggybank1

We repeated this activity with four handfuls of coins. He would have been happy to do another handful, but we ran out and it was time to get ready for lunch. Don’t have a lot of coins – no worries, you can empty the bank and use the same ones again!

Have you tried “feeding your piggy” with your little one?


Objectives:

  • cognitive development: identifying similar objects; size relationships
  • communication: using variation words “smaller” and “bigger”
  • physical skills: fine motor skills; hand-eye coordination
  • engaged senses – touch, hearing, and sight

Materials:

  • coin bank (any design or even a container with an opening cut for coins)
  • coins

Differentiation ideas:

  • sort coins by size/color
  • count coins as they are put into bank
  • for older children use as a math lesson (4 big coins plus two small coins) or a lesson on coin values

Level of mess:

  • clean

Play Plan: Baby & Toddler Bowling

Having two boys who love to eat, we have gone through a great deal of Gerber Puffs in the past two years. The containers puffs come in are great for art projects, storing supplies in a travel bag, or as my friend Stephanie from Bivone at Home uses them creatively as color “discovery” bottles. The shape of the puffs container has always screamed “bowling pin” to me, so that is how they are most often used in our home.

Knocking things down is so much fun for a toddler!

Knocking things down is so much fun for a toddler!

Bowling is a great activity to help little ones learn about taking turns. Our little guy, Roo, recently turned two and I feel we are constantly having to reinforce the idea of sharing and taking turns. (Nothing worse than the feeling you are nagging your child!) Setting ourselves up for success, I thought I would make taking turns a game for him with a fun bowling play plan. Bowling is exceptional for taking turns with a toddler because after he knocks down the pins, he is setting them up while you get in position to roll the ball next. It gives you the opportunity play before he has a chance to realize he even allowed you to do so, and then it becomes the norm!

Setting the pins back up requires concentration not to knock over the other pins.

Setting the pins back up requires concentration not to knock over the other pins.

Here’s how it worked in our home: I set up the pins and gave the ball to my son instructing him to roll the ball to the pins. (Warning: if you say, “knock down the pins” instead of “roll the ball to the pins”, you will probably have a child running over to knock the pins down with his hands and feet rather than the ball.)  Once the ball has been rolled to knock down the pins, your child is probably already chasing the ball toward the pins. If not, ask him to come over and set the pins back up. It will require concentration and focus for your toddler to do this task without knocking over the other pins. You may have some interesting pin formation when your toddler sets up the pins which is great for observing cause and effect as he will see closer pins fall over. While your toddler sets up the pins, you get in position to take a turn. As soon as the pins are ready, I say, “Now it is my turn,” and I roll the ball. He cheers as the pins fall and then eagerly begins setting them up again. This time when the pins are ready, I say, “Now it is your turn,” and he runs to the ball and takes his turn. We repeat this process until we are done playing. If he starts to grow weary of the game I suggest a change in the way the pins are stacked or change the way we are moving the ball (kick the ball, push with only one hand, roll through your legs, etc).

Baby loves knocking down a pin and having us cheer together at his success!

Baby loves knocking down a pin and having us cheer together at his success!

With baby Moose, this game is more about working on the gross motor skills and hand-eye coordination. When I play with him, I do not attempt to take a turn, but focus on getting him to move the ball in the direction of the pins. He loves the gratification of knocking down a pin and having us cheer together at his success.

Use what you have on hand for pins. Empty toilet paper rolls work great!

Use what you have on hand for pins. Empty toilet paper rolls work great!

Additionally he enjoys coming to experience cause and effect first hand by knocking down the pins with his hands. This is all apart of the exploration of the materials and typically once he’s done this a few times he’s ready to bowl again. With baby this game works best if you return the ball while you set up the pins so he has something to play with for those few seconds. You can use only one pin or as many as you’d like.

Bowling is a great game to get the family involved. Don’t have puffs containers? No problem! Be creative with materials on hand for your pins: toilet paper rolls, paper towel rolls cut in half, plastic cups, etc.

Objectives:

  • social skills: taking turns with parent and/or sibling during activity
  • cognitive development: experiencing cause and effect
  • physical skills: gross motor skills (rolling/kicking); fine motor skills (setting pins back up); hand-eye coordination
  • engaged senses – touch and sight
Simple materials for a great play plan!

Simple materials for a great play plan!

Materials:

  • Pins – puffs containers, paper towel rolls, toilet paper rolls, plastic cups, etc
  • Ball

Differentiation ideas:

  • kick the ball instead of rolling (or use a Twister game spinner to identify which hand/foot to use with the ball)
  • stack pins or arrange in different patterns to see varying cause/effect
  • add more pins for older children

Level of mess:

  • Clean

Play Plan: Sticky Paper Fall Leaves

Creating an inviting play area inspires little hands to dive in!

Creating an inviting play area inspires little hands to dive in!

Fall is my favorite season. I love the color bursts that we get to experience as the leaves change before disappearing to winter. We have been enjoying the cooler weather on walks and identifying different color leaves on walks with our little guys, so I thought a perfect activity to allow for creativity while working on concentration and focus would be to create our own Fall trees on sticky paper.

Contact paper is fantastic for projects with babies and toddlers because it removes the need for glue or tape when they are working. Typically we do play plan projects downstairs in the kitchen or living room, but I decided to move upstairs to a window that looked out on the tree line so the boys could have a visual in front of them of the Fall colors. (If the leaves don’t change in your area, or they have already fallen off, you could easily pull up an image on your computer screen, phone, or iPad to show them, or simply print a photo of trees.)

Concentration on creativity is a great part of play!

Concentration on creativity is a great part of play!

My plan was to cut a tree with bare branches out of brown construction paper. Unfortunately the stack of construction paper I had on hand did not include brown, so I borrowed the water colors and painted a tree onto a piece of white paper. I cut out my tree and taped it on the non-sticky side of the contact paper. Next I taped the contact paper to the window that we would be working on – this was the hardest part of the entire project! I learned that if you just peel the edge of the paper off the sticky surface you can tape the edges to your working area. If you are working on a table, this is probably easier as you have gravity on your side! For the boys’ trees I opted not to cute the tree off the paper I painted it on. It worked well, but you can see the difference in the photo and decide what you like best. Still needing leaves, I folded the construction paper several times and freely cut some leaves out of each color (yellow, red, orange and green). Wanting to create an engaging play area, I spread the leaves out rather than putting them in a container as I originally planned. I added a few leaves to the sample tree in the middle of the play area so that they would see what we were doing with the colorful leaves.

Even babies can do shape art projects easily with sticky contact paper!

Even babies can do shape art projects easily with sticky contact paper! 

We used this play plan following an afternoon nap. My two-year old, Roo, woke from his nap first this day so I let him get started first. He was excited by the trees hanging on the windows. He rushed over to the leaves and wanted to collect them all. I pointed at the trees outside and we talked about the colors we saw while comparing them to the leaves in his hand. Then I modeled putting leaves on the sample tree for him and named the leaf color as I pressed it onto the contact paper. He began sticking leaves on his tree. It was fun to observe how he worked as he wanted to put all the leaves on one branch before moving to another. He occasionally stepped back to see how his tree looked and giggled with joy.

Moose was so proud of his creation!

Moose was so proud of his creation!

Once little Moose woke up from his nap, he joined the fun. He observed what his brother was doing and jumped in right away. He practiced standing on his own as he explored the feeling of the sticky contact paper. He picked up leaves and placed them sporadically on the tree creating his masterpiece. None of his leaves made it to the top of his tree as it was too high for him to reach. He was so proud of his work and just gazed at it for a while.

One of the best parts of Fall is playing in the leaves. These paper leaves were equally as fun for an indoor leaf play party. The boys collected handfuls and threw them into the air to watch them flutter to the floor. They delighted in the falling leaves and crawled through the tiny piles. It was the perfect indoor celebration of Fall to end our play plan!

Throwing leaves into the air - the perfect indoor celebration of Fall to end our play plan!

The perfect indoor celebration of Fall to end our play plan!

Objectives:

  • cognitive development: understanding season changes; focus and concentration; creativity
  • physical skills: fine motor skills development; hand-eye coordination
  • communication: naming colors of leaves
  • engaged senses – touch and sight

Materials:

  • Contact paper
  • Tape
  • Scissors
  • Construction Paper – red, green, yellow, orange and brown

Differentiation ideas:

  • have an older child paint tree onto paper
  • create activity in felt for reusable play plan
  • attach to table for more controlled environment

Level of mess:

  • Clean

Play Plan Expansion: Golfball Painting Thank You Cards

Use two strips of tape to divide the paper into three sections.

While the Golfball Painting Play Plan I posted yesterday was truly about the process, I was impressed with the product that was created. The last few months of the year are busy with the boys’ birthdays and Christmas, so I know we will be writing thank you cards for gifts they receive. What better card to send than one that is handmade!

Adding a second ball to the container enhanced the activity and the decoration.

Adding a second ball to the container enhanced the activity and the decoration.

I used the same play plan but divided the paper into three sections using half strips of painter’s tape. The boys picked the colors they wanted to use and we did the activity again, this time making thank you cards. I replaced the paper in the container several times so that we would have a suitable number of cards. We started off using just one ball as we had done before, but we got ballsy toward the end and added a second ball to the container which actually enhanced the activity as they not only covered more of the paper with paint, but also provided the boys with additional sounds as the balls hit each other.

With just a few cuts after the paint dried, we had handmade cards by our one year old and two year old boys! (Using the 1/3 cut creates a card that fits in a regular envelope!) The final product looks great and will be loved by friends and family. When you care enough to send the best, skip Hallmark and go for the golf ball painting play plan!

With just a few cuts after the paint dried, we had handmade cards by our one year old and two year old boys!

With just a few cuts after the paint dried, we had handmade cards by our one year old and two year old boys!

Objectives:

  • to create handmade thank you cards for the holiday season
    • cognitive development: experimenting with cause and effect;  identifying colors
    • physical skills: fine motor skills development; working on bilateral coordination
    • engaged senses – hearing and sight

Materials:

  • Scissors
  • Card stock
  • Painter’s Tape
  • Clear container/Tupperware container/cake pan with lid
  • Washable Paint – primary colors (red, yellow, blue)
  • Optional: soap & water to have a little helper clean the balls

Differentiation ideas:

  • cut paper so it will be a folded note rather than having to flip it over to write
  • using more than one ball in the container to cover more of the paper
  • use holiday specific colors
  • add embellishments

Level of mess:

  • Clean

Play Plan: Golfball Paintings

Baby Moose is at the fun stage of babyhood where he likes to clank cups on the table, bang the remote on an end table and pat a box to hear the noise that things make. He is exploring cause and effect through sound. I wanted to do an activity that emphasized this natural learning where he could easily see the object making the noise came from his direct action.

Simple set up!

Simple set up!

In previous searches of toddler art activities I came across many websites listing ball painting. There are many variations, but the general idea consists of using balls in a box with paint to create a piece of art.  I thought this might be the perfect activity to help my youngest to visualize cause and effect while playing with sound creation.

Knowing my little guy likes to taste things, and wanting to do this activity without having to use edible paint, I decided that we would be using a container with a clear top so that he could see the ball move, hear the ball banging on the sides as he moved the container, but would not be able to touch the paint. I taped a piece of card stock paper to the bottom of the container using painter’s tape (because its what I have on hand and it wouldn’t tear the paper when I removed it later). I put paint in three spots of the tape and placed the ball in the container which I then sealed shut.

Baby observes ball moving and making noise as he moves the container.

Baby observes ball moving and making noise as he moves the container.

(Note: We did this activity in chairs at the table with both my toddler and baby, but the container we were using was quite large, so if you also use a large container you might try moving away from the table itself to do this.)

The boys were not given instructions but rather allowed to explore the container in front of them. The baby instantly went to banging the container on the table. He then started shaking it back and forth watching the ball move from side to side and giggling as it clanked inside.

Baby shakes the container to hear the ball move.

Baby shakes the container to hear the ball move.

The toddler began the activity by telling me the colors he saw inside and pointing out the ball. He saw his brother shaking the container and he slowly started by pushing the container across the table to watch the ball move. I suggested he pick up the container. He did so and began swaying with it in his booster seat, observing the colors swoosh across the paper and the ball bump into the sides with a rattling sound.

Kids are kept clean while painting is messy

Kids are kept clean while painting is messy

Once they were done exploring, I placed the containers aside for the paint to dry. My toddler has been working on helping tasks, so he was responsible for giving the balls a bath to clean them up in a small tube of soapy water. When the boys went to bed, I peeled the tape off the paintings and quickly washed the the containers in the sink.

Using two hands promotes bilateral coordination

Using two hands promotes bilateral coordination

In addition to enjoying painting projects, I liked that this activity would work on my toddler’s bilateral coordination. By using both hands to move the box, he would be stimulating both sides of the brain to work together. It is important to work on these type of skills to help with things everyday activities down the line – like pulling on pants, catching a ball and one day driving a stick shift car…ok that’s a long way in the future! Furthermore, we could review how colors combined to make new colors when the paints combine.

Their beautiful artwork was put on display in the playroom and the following day I was able to show the boys their paintings and review all the colors that were in it (which of course were more than just the three primary colors we started with). This provided a chance to recall memory by talking about events from the previous day – another development benefit that I had not planned on!

Beautiful finished pieces of art hanging in the playroom.

Beautiful finished pieces of art hanging in the playroom.

Objectives:

  • cognitive development: experimenting with cause and effect;  identifying colors
  • physical skills: fine motor skills development; working on bilateral coordination
  • communication: naming colors and balls
  • engaged senses – hearing and sight

Materials:

  • Card stock
  • Painter’s Tape
  • Clear container/Tupperware container/cake pan with lid
  • Washable Paint – primary colors (red, yellow, blue)
  • Optional: soap & water to have a little helper clean the balls

Differentiation ideas:

  • use more than one golfball
  • use a variety of balls/marbles
  • use different colors of paint based on season
  • use painters tape to only paint certain shapes or to block a shape from painting

Level of mess:

  • Clean

Play Plan: Cardboard Tube Drop

We use a large quantity of paper towels in our home so we frequently have an abundance of cardboard tubes. When paired with just a few materials from around the house, these tubes are a great tool for planned play activities.

Independent fun matching colors in cardboard tube drops!

Independent fun matching colors in cardboard tube drops!

My toddler had so much fun with the pom-poms the last time we used them for color sorting, I immediately thought they should be utilized with the cardboard tubes. I selected five colors of pom-poms and taped each one to a cardboard tube so the tube would be assigned a color. Next I used painter’s tape to attach the tubes to a wall.  Finally, I made sure to collect pom-poms in each color so that we would have something to place in each tube.

I used this play plan first with my toddler as a quiet activity while my husband was bathing our baby. When presented with the materials, examined the tubes and pointed out the different colors trying to name the color of the pom-pom on each tube. I modeled putting the soft pom-poms individually into the tubes. We practiced matching colors and putting orange pom-poms into the orange tube. He soon was able to do this on his own and would collect the pom-poms from the floor and start again. This was a great independent activity for him that kept him engaged far longer than I anticipated. He focused on the pom-poms and the individual tubes as he worked on his hand-eye coordination. Once he had exhausted the fun of matching colors, we worked together to stuff all of the pom-poms into a single tube so they would get stuck. He would hand me the tube and I would blow into it, causing all of the pom-poms to come shooting out. After much giggling we repeated the process. When we had all of the pom-poms in the tube I would ask, “What will happen when I blow?” and he would reply “Boom” (his way of telling me the pom-poms would explode out). We played with these few items until it was time to wind down for bed. I was excited about how engaged he was with these simple materials.

Simple supplies make for great learning!

Simple supplies make for great learning!

The following day I wanted to try using the cardboard tubes to work on hand-eye coordination with our baby. While his older brother was napping I adapted the activity since I knew baby Moose would try to eat the pom-poms; I opted for three aluminum foil balls and just one tube taped to the wall. I modeled picking up a ball and placing it in the top of the tube. He observed what I was doing and giggled as the foil hit the floor. Soon he was joining in and participating in dropping the balls into the tube. We continued this game for about 10 minutes together before he wanted to explore the cardboard tube further. I took it off of the wall for him. He tasted the tube and he tasted the foil. We rolled the tube on floor and then he would push the foil with the tube, all while working on hand-eye coordination in ways I had not even planned!

This was one of the easiest play plans to construct, but provided great benefits for both baby and toddler. Simple supplies make for great learning with this play plan!

Exploring materials is part of the fun!

Exploring materials is part of the fun!

Objectives:

  • cognitive development: focusing on one object; matching colors; observing cause and effect
  • physical skills: hand-eye coordination
  • engaged senses – touch and sight

Materials:

  • Painter’s tape or masking tape
  • Clear tape (optional – to attach pom-pom/color label)
  • Cardboard tubes
  • Pom-poms, aluminum foil, or paper balls

Differentiation ideas:

  • Hold the tubes rather than applying to the wall to create a varied depository
  • Have an older child paint/decorate the tubes in specified colors
  • Count the number of objects put through each tube for a lesson on counting
  • Give the tubes points to make it a math lesson for older children

Level of mess:

  • Clean

Play Plan: Window Bag Painting

My little Moose is in the fun stage of transitioning from crawling to walking. He is pretty good with balancing upright on his own when he’s distracted by something, so I wanted to do an activity that would encourage him to stand while not focusing on holding on. I looked at materials I had on hand and thought about things I had seen recently online. I decided to go back to an old sensory activity that was a flop at our house and just changed the location to get my little guy upright.

The boys were eager to start playing without any prompting!

The boys were eager to start playing without any prompting!

Previously when I had my boys paint inside of Ziploc bags at the table, they were completely uninterested. One simple change of moving the painting surface to the glass door changed everything! As soon as I taped the bags to the doors, they came over to explore and immediately. They were actively engaged in working with the materials without prompting. Little Moose was up on his feet in no time.

Both boys moved freely between the three different colors on the windows, squishing the paint in the Ziplocs. I wanted to challenge my older son, so I picked up three sensory balls in the same colors as our paint and asked him to match the ball color to the corresponding window painting.

Adding sensory balls to match colors and then make prints in the paint

Adding sensory balls to match colors and then make prints in the paint

He would compare the ball to each color and then place it on the ground by the correct one. Once he correctly matched the colors we then tested out what happens if he rolls the small, bumpy ball on painting.

I encouraged both boys to spread the paint to cover the entire surface area as I modeled with the red paint. Little Moose spread yellow around the bag while his brother covered the blue bag. At this point our little guy was getting tired of standing so I moved him to play with the sensory balls nearby, and used the window paintings to do a beginning lesson on color mixing with his big brother.

Moose and Roo spread the paint to fill their window bag paintings.

Moose and Roo spread the paint to fill their window bag paintings.

By moving the window painting bags so they would overlap, we were able to see the colors transform. I placed the red and blue bags next to each other and reattached the tape. I asked him to name the colors; in his little toddler voice he said pointed to each and said “Red. Blue.” I then handed him the yellow bag with the tape on the edges and asked him to hold it over the two window paintings while I pressed down the tape. We stepped back and he was in awe at the colors he could see. I again asked him to name the colors he could see. We went through red, orange, green and blue. He peeled the tape to lift the yellow bag again and showed me it was yellow, and then tapped it back over the blue while pointing and exclaiming, “Green!” It was so much fun to watch him explore the change he was seeing!

Two minutes of prep provided an activity for balance and a simple foundation on primary color combinations. This simple activity accomplished goals for both of my guys and was easily differentiated for their levels of learning. Definitely a great activity for a variety of learners!

Overlapping the bags is a simple way to teach about color mixing.

Overlapping the bags is a simple way to teach about color mixing.

Objectives:

  • cognitive development: experimenting with cause and effect;  identifying and matching colors
  • physical skills: improving balance skills; fine motor skills development and hand-eye coordination moving paint in bag
  • communication: naming colors
  • engaged senses – touch and sight

Materials:

  • Painter’s Tape or Masking Tape
  • Ziploc – gallon freezer bags (3)
  • Washable Paint – primary colors (red, yellow, blue)

Differentiation ideas:

  • use a variety of objects to move paint in the bag and make tracks (balls, cars, etc)
  • have children paint on opposite sides of the glass
  • put more than one color of paint into the bags to see color combination in bag

Level of mess:

  • Clean